
Please Call Before Collecting
If you’ve started looking into corrugated roofing sheets, you’ll already know one thing: there are more decisions to make than you first expected. With thickness, profile depth, sheet length, and fixings, it’s easy to end up with a dozen browser tabs open and no clearer idea of what you need.
This guide is here to cut through that. Whether you’re roofing a garden shed, a workshop, a lean-to, or a full-size agricultural or industrial building, here’s what actually matters when choosing metal corrugated sheeting, so you can order with confidence rather than guesswork.
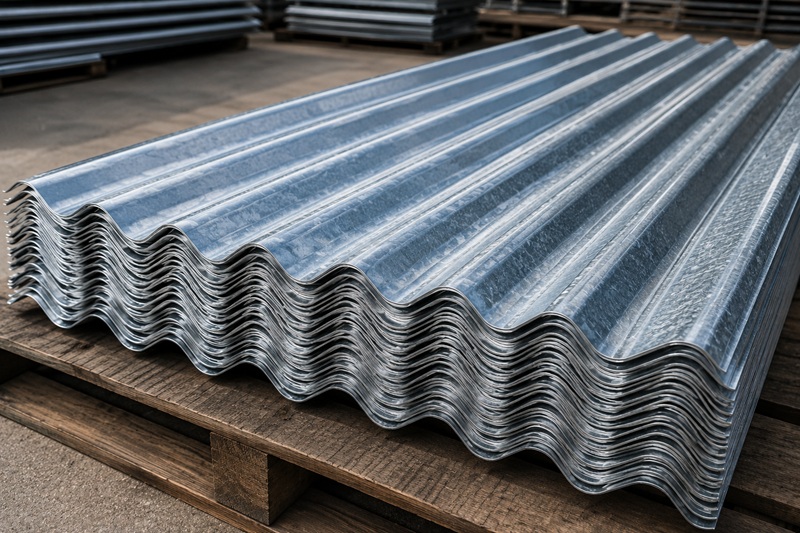
Corrugated sheeting simply refers to metal that’s been rolled or pressed into a wavy or ridged profile rather than left flat. That rigid shape is what gives the sheet its strength; a flat sheet of the same thickness would flex and sag, but the corrugations act a bit like folds in a piece of paper, making it far more rigid without adding extra weight or cost.
The profile also does practical work: the ridges let rainwater run off quickly and channel it away from the overlaps, which is a big part of why corrugated metal roofing has stayed popular for well over a century, from Victorian farm buildings to modern garden studios.
Not all metal corrugated sheeting is the same, and the differences matter more than people expect.
Galvanised steel is the classic choice for sheds, workshops, agricultural buildings and light industrial use. The zinc coating is applied to the steel through a hot-dip galvanising process, which bonds it to the surface and gives the sheet strong resistance to rust and corrosion. It’s tough, affordable, easy to cut and fix on site, and forgiving of the odd scratch or scuff during handling, since the surrounding zinc coating continues to protect the exposed steel, a property known as “sacrificial protection.” This makes it a genuinely low-maintenance option once it’s up, with no painted finish to touch up or replace over time.
Sheet thickness (gauge) is one of the most important — and most overlooked — specifications. Gauge refers to the thickness of the steel itself, usually measured in millimetres, and it has a direct effect on how strong and rigid the finished sheet is. Lighter gauges, around 0.4mm to 0.5mm, are common for garden sheds, small workshops and other structures with closely spaced purlins, where the sheet doesn’t need to span far unsupported. Heavier gauges, up to 0.7mm or more, are better suited to larger agricultural or industrial buildings, wider purlin spacings, or locations exposed to strong wind or heavy snow loading, where the roof needs to resist greater pressure without flexing.
Most of the sheets we supply are 0.54mm (24 SWG), which sits comfortably in the middle of that range. It’s a thickness that works well across a wide variety of projects — sturdy enough for most sheds, workshops and outbuildings, while still being light and easy to handle and fix on site. It’s a sensible default if you’re not working to a specific structural spec, though it’s always worth checking your span and loading if your building is larger or more exposed than average.
As a rough guide: thicker sheets cost more per square metre but allow wider spacing between purlins, which can reduce the amount of structural timber or steel you need underneath — so it’s worth weighing up sheet cost against structural savings rather than looking at the sheet price in isolation. If you’re unsure which gauge suits your project, it’s always worth checking against the span and loading before ordering, rather than assuming thinner will do — a sheet that’s too thin for its span can visibly “oil-can” or ripple, and in worse cases sag or deform under load.
Profile depth is another detail worth thinking about. Standard corrugated profiles (often referred to by their wave pitch and depth) are designed to give a good balance of rigidity and water run-off for most roofing jobs. Deeper, more pronounced corrugations generally offer greater strength and are better suited to wider purlin spacings, while shallower profiles are common on smaller, more traditional-looking outbuildings. Matching the profile to your purlin spacing, not just picking on appearance, will save you problems later.
Corrugated sheets come in standard widths, but the effective coverage width is always less than the sheet’s actual width, because each sheet needs to overlap the next by one or two corrugations to stay watertight. This overlap is easy to forget when calculating how many sheets you need, and it’s the most common mistake people make when ordering; they end up short by a sheet or two.
A simple way to avoid this: measure the total width of the roof, then divide by the effective coverage width of your chosen sheet (not the total sheet width) to work out how many sheets you need side by side. Always round up, and it’s worth ordering slightly more than the bare minimum to allow for cutting and any mistakes.
Lengths matter too. Wherever possible, choose a sheet length that spans the full roof slope in one piece; this avoids end laps, which are another potential point for leaks. Metal sheets can often be supplied cut to your specific length, which is worth asking about if your roof doesn’t match a standard size, since it saves waste and reduces the number of joins. If your roof is longer than the maximum sheet length available, you will need an end overlap, and a minimum of 150mm is generally recommended, more if the roof pitch is shallow.
Speaking of pitch: corrugated metal sheeting typically needs a minimum roof pitch of around 10 degrees to shed water properly, though this can vary slightly depending on the specific profile depth. A roof that’s too flat can allow water to sit in the corrugations or seep back under the laps, so it’s worth checking the minimum pitch recommendation for your chosen profile before finalising your roof design.
It’s tempting to think of fixings as an afterthought, but with metal roofing, they’re just as important as the sheets themselves. Get them wrong, and you’ll end up with leaks, rattling in the wind, or sheets that work loose over time.
A few key points:
Before placing an order, it’s worth confirming: the exact roof dimensions (including any overhangs), the pitch of the roof, the sheet gauge and profile suited to your span and loading, and whether you need any additional accessories such as ridge caps, flashing, or ventilation strips to finish the job properly. These small extras are easy to forget but make a real difference to how weathertight and finished the roof looks.
Metal corrugated roofing has remained popular for a good reason: it’s strong, long-lasting, and straightforward to install once you understand the basics. Get the gauge, sizing and fixings right from the start, and you’ll end up with a roof that does its job quietly for decades to come.